Key Lime Pie Rice Krispie Treats are a bright, tangy, no-bake twist on a classic. They invite a zingy bite and a creamy finish, perfect for quick weeknight finales. They come together in minutes, and I love that this Banana Pudding variation adds creamy binding. It looks fancy but wants to be kept simple, which is my jam after a busy day. I’ve learned that no-bake desserts can be bright, comforting, and make-ahead friendly. This Banana Pudding twist gives a creamy center and a crunchy crumble that echoes key lime without needing an oven. It’s exactly the kind of treat I reach for when life rushes by. Plus, they stash well in the fridge for a cool, refreshing bite the next day.
Table of Contents
Table of Contents
What makes this Key Lime Pie Rice Krispie Treats special
Key Lime Pie Rice Krispie Treats are a showstopper that behaves like a reliable friend. They come together in minutes, no oven needed. The Banana Pudding variation adds a creamy binding and a crunchy wafer crumble. It gives a playful lime vibe while staying fuss-free. They’re make-ahead friendly, kid-approved, and perfect for potlucks, office days, or after-school snacks. This combo stays bright in the fridge for days and travels well. It’s a comforting finish after a long day without turning on the oven. I love how they stay bright in the fridge. I keep extra bars on hand for spontaneous gatherings.
A quick, no-bake dessert that fits a hectic schedule
On busy mornings, this no-bake dessert slides into the fridge and waits. It saves you heat, time, and cleanup. You can assemble it in minutes and forget it until dessert time. The result ships well to school events or office potlucks.
Tangy lime meets creamy banana pudding crunch
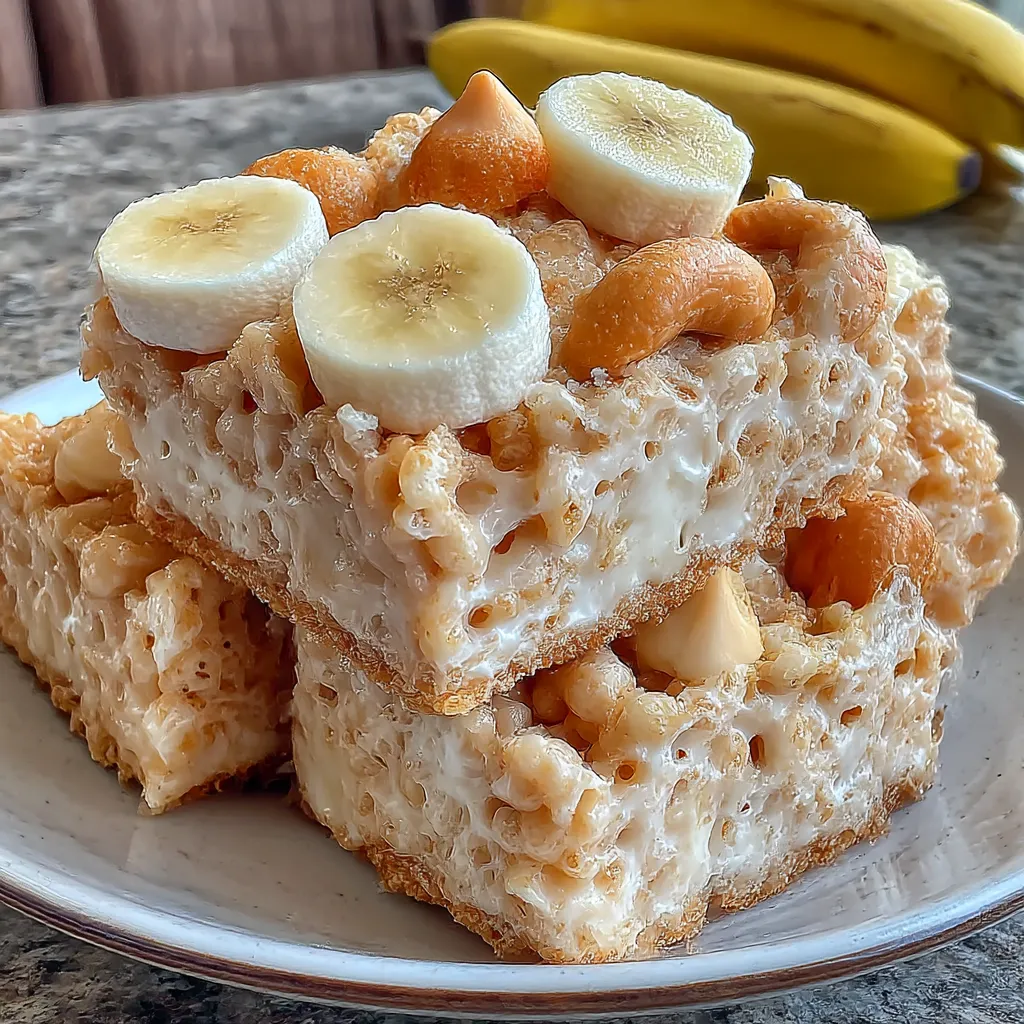
That first bite pairs tangy lime with a creamy banana pudding center. Then a crisp crumble from vanilla wafers adds texture. It feels fancy yet comforting, easy to serve to guests. It travels well for potlucks, too.
Ingredients Key Lime Pie Rice Krispie Treats
These Key Lime Pie Rice Krispie Treats are a pantry-friendly, no-bake option for busy days. I reach for them when the clock is ticking but I still want something bright and comforting. In this section, I list every ingredient with exact measurements and share quick tips so you can shop once and print a ready-to-go checklist.
- 6 cups Rice Krispies cereal
- 4 cups mini marshmallows
- 3 tablespoons unsalted butter
- 1 small box instant banana pudding mix (halal-friendly)
- ½ cup crushed vanilla wafers
- ¼ teaspoon salt
- Optional: banana chips for topping
Note: exact quantities are listed above and print-ready quantities are available at the bottom of the article for convenience.
The pantry staples you’ll need
Stock these so you can pull this dessert together in minutes. Rice Krispies give the crunch, while mini marshmallows melt into a soft binding. Butter adds richness, and the banana pudding mix brings creamy tang. Crushed vanilla wafers add texture, and a pinch of salt heightens sweetness. If you’re Halal-conscious, choose a halal-certified banana pudding mix and ensure your banana chips are free from non-Halal additives.
Optional add-ins and substitutions
For more banana-forward flavor, fold in a little mashed banana into the marshmallow mix. If dairy is an issue, swap butter for a dairy-free alternative and use vegan marshmallows. Gluten-free? Use gluten-free Rice Krispies. Want extra zing? A touch of lime zest can wake the tang without overpowering the banana pudding base.
How to Make Key Lime Pie Rice Krispie Treats
Here’s how I pull together these bright, no-bake bars. The method keeps weeknights simple and delicious, which is exactly how I like dessert to show up in life.
These Key Lime Pie Rice Krispie Treats come together in minutes, and the Banana Pudding variation gives a creamy binding and a crunchy wafer crumble.
Step 1 – Prep and melt the butter
Lightly grease an 8×8-inch pan and set it aside. I keep things simple with a quick coat that helps release the bars later.
In a large pot over low heat, melt the butter until it glistens. I stir with a silicone spatula so nothing sticks or scorches.
Next, add the mini marshmallows and stir until they melt into a smooth, glossy pool. A gentle flame keeps the texture silky, not clumpy.
Season with a pinch of salt to balance the sweetness. This little wink of contrast makes the lime flavors pop in the end. This is the base for the Key Lime Pie Rice Krispie Treats, and I love how calm this step feels after a busy day.
Step 2 – Stir in marshmallows and banana pudding mix
Remove the pot from heat so the mix stays glossy and doesn’t seize. I love this moment because the kitchen starts smelling like a tangy dream.
Whisk in the banana pudding mix and salt until fully combined and smooth. The pudding powder brings creaminess without needing dairy splashes.
If you want a brighter note, whisk in a tiny squeeze of lime juice. It wakes up the tang without overpowering the banana twist.
Let the mixture rest for a minute so it cools just enough to avoid melting the Rice Krispies on contact. This step is the secret binding that makes the bars cut neat and hold their shape as you bite in.
Step 3 – Fold in Rice Krispies cereal and crushed vanilla wafers
Pour in the Rice Krispies and the crushed vanilla wafers. I love the wafer crumble for that vanilla toast and texture bite.
Gently fold with a silicone spatula until every puff is coated. Don’t overmix; you want the cereal to stay light and crunchy in every square.
If you’re using mashed banana for extra zing, fold it in now. The banana keeps the center creamy and ties back to the banana pudding vibe.
The mixture should be sticky enough to hold together but not gluey. If it’s too loose, give it a minute to rest; if too tight, a splash of lime juice can loosen it just enough.
Step 4 – Press into pan and set
Scoop the mixture into your prepared pan. I spread it loosely at first to keep the crumb structure intact.
Use a lightly oiled spatula or the back of a spoon to press it evenly to the edges. Aim for a smooth, level top that’s firm to the touch.
Let it set at room temperature for 30–40 minutes, or speed things up in the fridge for 15–20 minutes. I often pop mine in the fridge to keep everything neat while I tidy the kitchen.
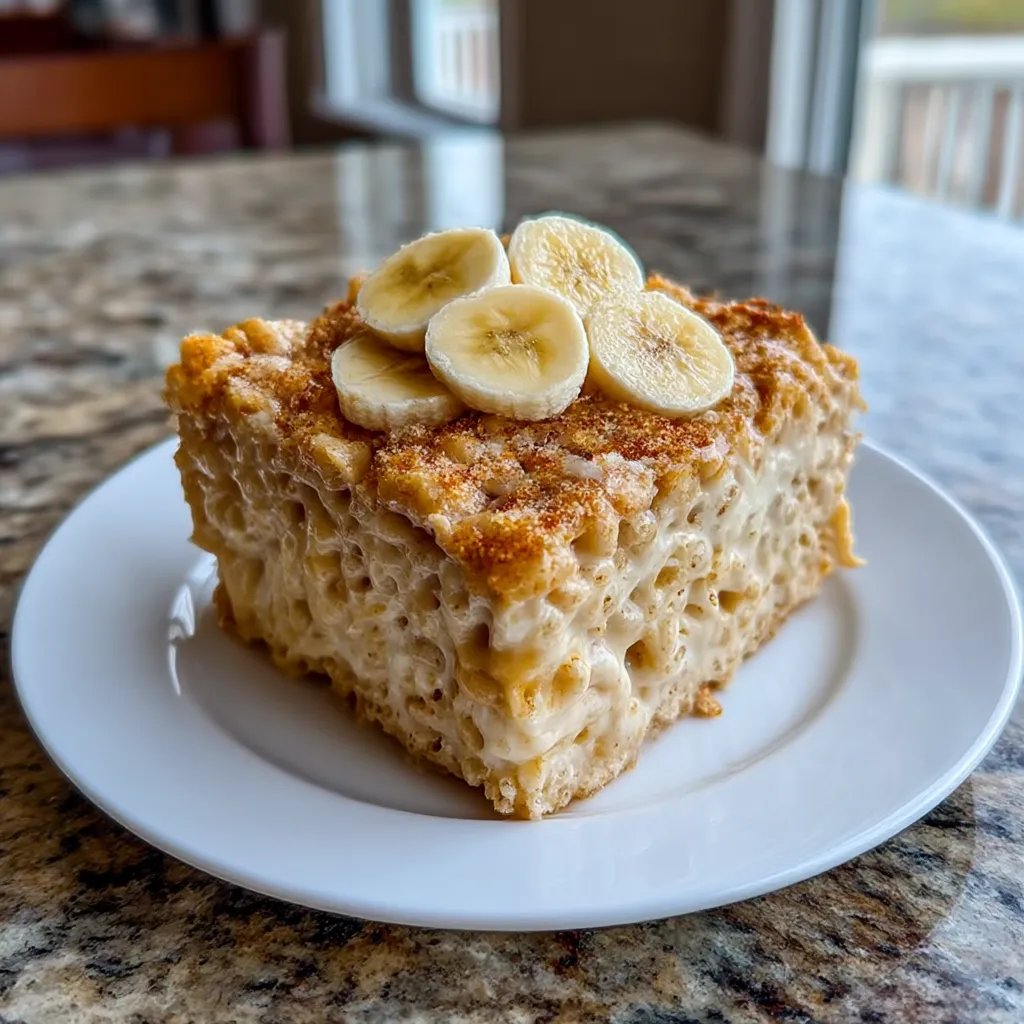
When the surface is firm, lift the slab by the parchment edges and cut into nine squares. This step yields neat, bite-sized pieces perfect for sharing or packing in lunches. You’re making classic Key Lime Pie Rice Krispie Treats, just without the oven.
Step 5 – Optional toppings and serving notes
Top with banana chips for a fruity crunch, lime zest for extra zing, or a light crumble of extra vanilla wafers.
Serve these treats chilled or at room temperature, depending on your mood and the weather. They travel well for potlucks or office snacks.
Store any leftovers in an airtight container in the fridge for up to a week. The banana pudding binding stays creamy when cooled, and the wafers stay crunchy with a brief chill. Enjoy the bright, no-fuss joy of Key Lime Pie Rice Krispie Treats any time you want a quick dessert win.
Tips for Success
- I gather ingredients first to keep the Key Lime Pie Rice Krispie Treats on track.
- I grease the pan lightly and line with parchment.
- Melt marshmallows on low heat for a glossy binding.
- Fold in banana pudding mix gently to maintain texture.
- Press evenly with a spatula for neat bars.
- Chill 15–20 minutes to set firm edges.
- These Key Lime Pie Rice Krispie Treats taste better chilled.
- Keep extras stored in an airtight container.
Quick troubleshooting tips
- If the mixture is too sticky, let it rest a few minutes to firm, then add a spoonful of extra Rice Krispies.
- If bars crumble, chill longer or wipe the knife with hot water between cuts.
- If the lime notes get lost, stir in a tiny bit of lime zest or juice.

Equipment Needed
Here’s my lean toolkit to pull this no-bake treat together in minutes.
- 8×8-inch pan, greased or parchment-lined
- Large pot for melting marshmallows
- Silicone spatula
- Measuring cups and spoons
- Parchment paper or nonstick spray
- Sharp knife or bench scraper for cutting
Practical tool alternatives
Practical tool alternatives: use a microwave-safe bowl for melting marshmallows, and a spatula or wooden spoon in place of silicone. If parchment isn’t handy, spray the pan generously.
Variations
I love giving Key Lime Pie Rice Krispie Treats new personalities. These variations keep the bright lime vibe while fitting different diets for busy days.
Banana pudding twist ideas
- Fold in a spoonful of mashed banana for extra creaminess.
- Increase crushed vanilla wafers for a richer, vanilla-crackle bite.
- Swirl a thin layer of banana pudding between the melts for texture.
- Add a touch of lime zest to sharpen the tang without overpowering banana.
- Layer in a thin cream-cheese ribbon for tangy silk.
Lime-forward and no banana
- Omit the banana pudding; boost lime zest and juice.
- Add a splash of lime juice to wake tang.
- Use coconut cream for a dairy-free tang.
Dietary-friendly options (dairy-free, gluten-free, halal considerations)
- Dairy-free binding: use coconut oil and vegan marshmallows.
- Gluten-free: pick gluten-free Rice Krispies and wafers.
- Halal considerations: choose halal-certified banana pudding mix; verify chips.
- Nut-free option: use allergen-safe wafers and avoid cross-contact.
Why You’ll Love This Key Lime Pie Rice Krispie Treats
I love how Key Lime Pie Rice Krispie Treats come together in a snap.
I love that there’s no oven, no fuss, just bright lime, creamy binding, and a crunchy crumble.
I stash them in the fridge; they travel well.
Make-ahead friendly means dessert is ready when you need it, not when you can bake.
Best of all, the tangy lime and vanilla wafer crunch feel special without stress.
Serving Suggestions
- Serve Key Lime Pie Rice Krispie Treats cold or at room temperature with whipped cream and lime zest.
- Pair with sparkling lime water or mint tea for a refreshing balance.
- Create a bright platter with berries and lime wedges for presentation.
- Add a scoop of vanilla ice cream for a comforting finish.
More Ways to Enjoy Key Lime Pie Rice Krispie Treats
There are more ways to enjoy Key Lime Pie Rice Krispie Treats beyond the pan. I love making them portable for busy days and gifting them in wraps.
A few clever tweaks stretch flavor and save time. These ideas keep the bright lime vibe without extra effort.
Make-ahead ideas and portioning
Make-ahead options save me when weeknights demand speed. Slice into nine neat squares or cut into sixteen bite-sized bars.
Store in an airtight container, layered between parchment, then chill for freshness.
Freeze for up to a month, thawing at room temp for softness.
Pairings for a complete dessert platter
Pair these treats with bright companions to form a dessert platter.
Fresh berries, lime wedges, and a dollop of whipped cream lift the lime.
Add mint for color and a light sparkling beverage to cleanse the palate.
FAQs
Here are quick answers about Key Lime Pie Rice Krispie Treats. These tips help you tailor the recipe for dairy-free, Halal, gluten-free needs, and easy make-ahead options.
Can I make this dairy-free or vegan?
Yes. I swap butter for dairy-free alternatives like coconut oil. Use vegan marshmallows. Choose a dairy-free banana pudding mix. Check labels to avoid dairy and gelatin. The texture stays similar, though binding can vary slightly. This version is friendly for dairy-free guests.
Is this Halal-friendly and gluten-free-friendly?
Yes, with quick tweaks. Use halal-certified banana pudding mix and halal wafers. Check chips for halal status. For gluten-free, choose gluten-free Rice Krispies and gluten-free wafers. Always read labels for cross-contact and trace ingredients. The result stays bright and satisfying.
How long does it keep and how should I store it?
These store well with simple care. At room temperature in an airtight container, they last about 2 days. In the fridge, up to 1 week. For longer keeping, freeze for up to a month. Thaw in the fridge or at room temperature before serving.
Can I freeze or meal-prep these?
Absolutely. Freeze for up to a month. Wrap bars individually or layer in an airtight container with parchment between. Thaw in the fridge overnight or at room temperature for 30–60 minutes. For best texture, eat within a day after thawing, though they’re still tasty chilled.
Final Thoughts
These Key Lime Pie Rice Krispie Treats remind me how dessert can be quick, bright, and comforting. I love sharing them with busy friends who crave something easy yet celebration-ready. The no-bake approach means less heat in summer, less mess on weeknights.
Creamy banana pudding binding and vanilla wafer crumble give them personality. If you need to chill and still feel pampered, this is your plan. Make a batch, slice it up, and watch everyone smile.
For me, these bites prove you can have bakery-worthy flavor at home, with kids underfoot and a calendar full. They stay bright in the fridge, travel well, and never demand years of practice.
Print
Key Lime Pie Rice Krispie Treats offer 5 Easy Variations.
- Total Time: 56 minutes
- Yield: 9 servings 1x
- Diet: Halal
Description
Key Lime Pie Rice Krispie Treats Banana Pudding Variation – a bright, tangy, no-bake dessert riff inspired by key lime pie, featuring Banana Pudding Rice Krispies, creamy marshmallow binding, and a crunchy vanilla wafer crumble.
Ingredients
- 6 cups Rice Krispies cereal
- 4 cups mini marshmallows
- 3 tablespoons unsalted butter
- 1 small box instant banana pudding mix (halal-friendly)
- ½ cup crushed vanilla wafers
- ¼ teaspoon salt
- Optional: banana chips for topping
Instructions
- Lightly grease an 8×8-inch pan and set aside.
- Melt butter in a large pot over low heat.
- Add marshmallows and stir until completely melted and smooth.
- Whisk in banana pudding mix and salt until fully combined.
- Remove from heat and gently fold in Rice Krispies cereal and crushed vanilla wafers.
- Press mixture evenly into the prepared pan.
- Optional: Sprinkle banana chips on top and lightly press in.
- Let set until firm, then cut into squares and serve.
Notes
- For extra banana flavor, fold in a small amount of mashed banana into the marshmallow mixture before adding Rice Krispies.
- Store in an airtight container at room temperature up to 2 days, or refrigerate for up to 1 week.
- Use halal-certified banana pudding mix to keep it Halal-friendly.
- Prep Time: 15 minutes
- Cook Time: 0 minutes
- Category: Dessert
- Method: No-Bake
- Cuisine: American
Nutrition
- Serving Size: 1 square
- Calories: N/A
- Sugar: N/A
- Sodium: N/A
- Fat: N/A
- Saturated Fat: N/A
- Unsaturated Fat: N/A
- Trans Fat: N/A
- Carbohydrates: N/A
- Fiber: N/A
- Protein: N/A
- Cholesterol: N/A
Keywords: Key Lime Pie Rice Krispie Treats, Banana Pudding Rice Krispies, No-Bake Dessert, Rice Krispies Treats, Halal Banana Pudding Snack