
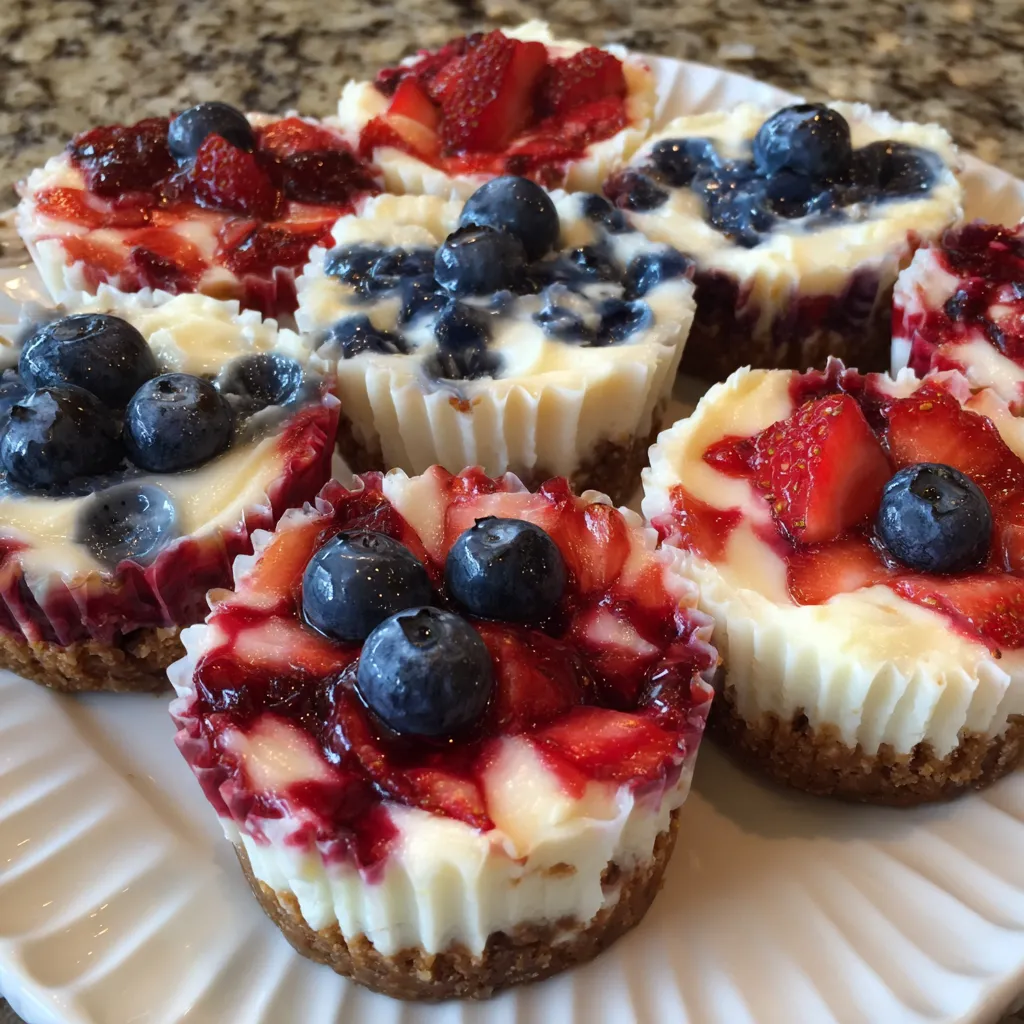
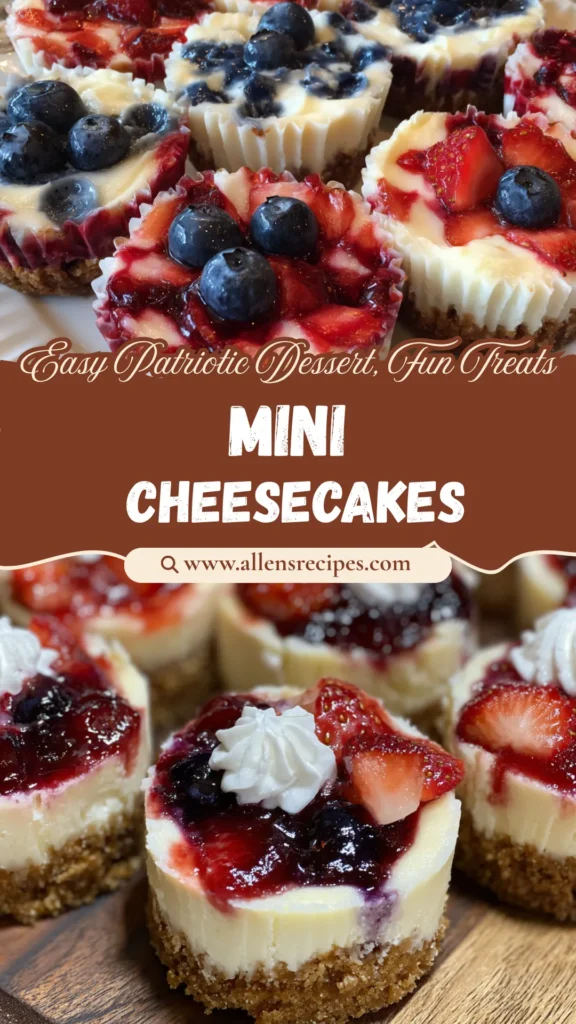
Red, White & Blue Mini Cheesecakes are the star of any Independence Day gathering, offering a creamy, tangy base swirled with vibrant strawberry and blueberry purees that capture the colors of the American flag. These bite‑size treats bake in a standard muffin tin, making them easy to portion and perfect for picnics, potlucks, or backyard barbecues. With a simple graham cracker crust, a smooth cheese filling, and a fluffy whipped‑cream topping, they deliver a festive look and a so balanced flavor that will impress guests of all ages. Follow our step‑by‑step guide to create a stunning dessert!!
Table of Contents
Why You’ll Love This Red, White & Blue Mini Cheesecakes
Patriotic desserts have a way of turning an ordinary gathering into a memorable celebration, and these mini cheesecakes do exactly that. Their three‑layer color scheme instantly evokes the flag, making them a visual centerpiece without any extra decorating effort. The contrast between the sweet strawberry swirl, the deep blueberry puree, and the classic vanilla‑infused cheesecake creates a flavor profile that feels both familiar and exciting, pleasing a wide range of palates from kids to adults.
Beyond aesthetics, the recipe is designed for convenience. All the ingredients are pantry staples or easily found at any grocery store, and the preparation steps are straightforward enough for even a beginner baker. Because the cheesecakes bake in a muffin tin, you end up with perfectly sized portions that are easy to serve, transport, and store. This makes them ideal for potlucks, picnics, or any event where you need a dessert that can be plated individually.
Equipment You’ll Need
Before you dive into the mixing bowls, gather the following tools to keep the process smooth and efficient. Having everything on hand will reduce the time spent searching for items and help you maintain a clean workspace.
- Standard 12‑cup muffin tin
- Paper liners for the muffin tin
- Two large mixing bowls (one for crust, one for filling)
- Electric mixer or handheld whisk
- Rubber spatula
- Measuring cups and spoons
- Small kitchen torch (optional, for a lightly browned top)
- Cooling rack
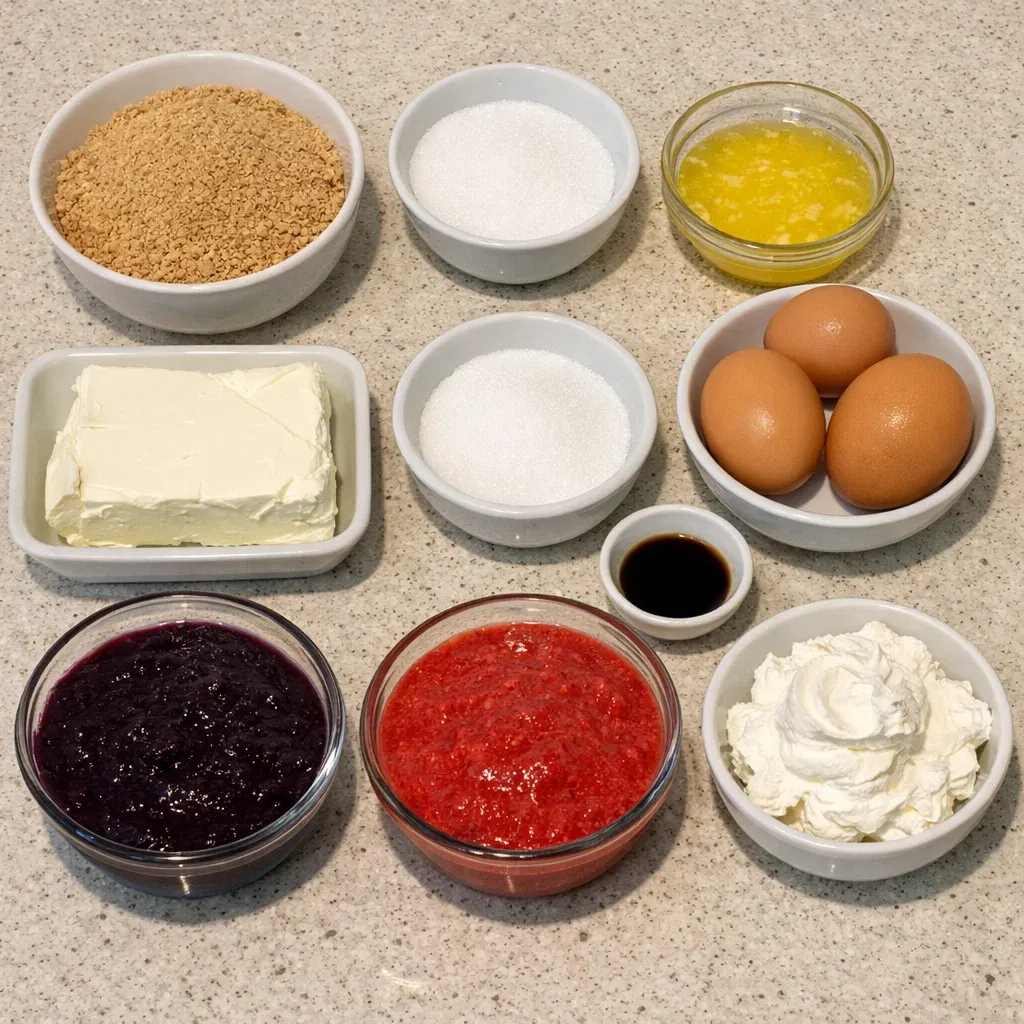
Ingredients for Red, White & Blue Mini Cheesecakes
All ingredients are measured for twelve mini cheesecakes, yielding a perfect serving size for a small gathering or a larger party with a few extra for seconds.
- 1 cup graham cracker crumbs
- 1/4 cup granulated sugar (for crust)
- 1/2 cup butter, melted
- 16 oz cream cheese, softened
- 1 cup granulated sugar (for filling)
- 1 tsp vanilla extract
- 3 large eggs
- 1 cup blueberry puree
- 1 cup strawberry puree
- Whipped cream for topping
Ingredient Substitutions
If you need to adjust the recipe for dietary preferences, consider these simple swaps: use a gluten‑free graham cracker crumb alternative for a gluten‑free crust, substitute the whipped cream with coconut whipped topping for a dairy‑free version, or replace the vanilla extract with a hint of almond extract for a different flavor nuance. The core structure of the cheesecake remains reliable with these minor changes.
How to Make Red, White & Blue Mini Cheesecakes (Step‑By‑Step)
Step 1: Preheat the Oven
Set your oven to 325°F (160°C). Preheating ensures the oven reaches the correct temperature before the cheesecakes go in, which helps them bake evenly and prevents cracking. While the oven warms, you can begin preparing the crust.
Step 2: Prepare the Crust
In a mixing bowl, combine the graham cracker crumbs, 1/4 cup sugar, and melted butter. Stir until the mixture resembles wet sand. Press the crumb mixture firmly into the bottom of each muffin liner, creating an even layer about 1/4 inch thick. This creates a buttery base that adds texture and flavor.
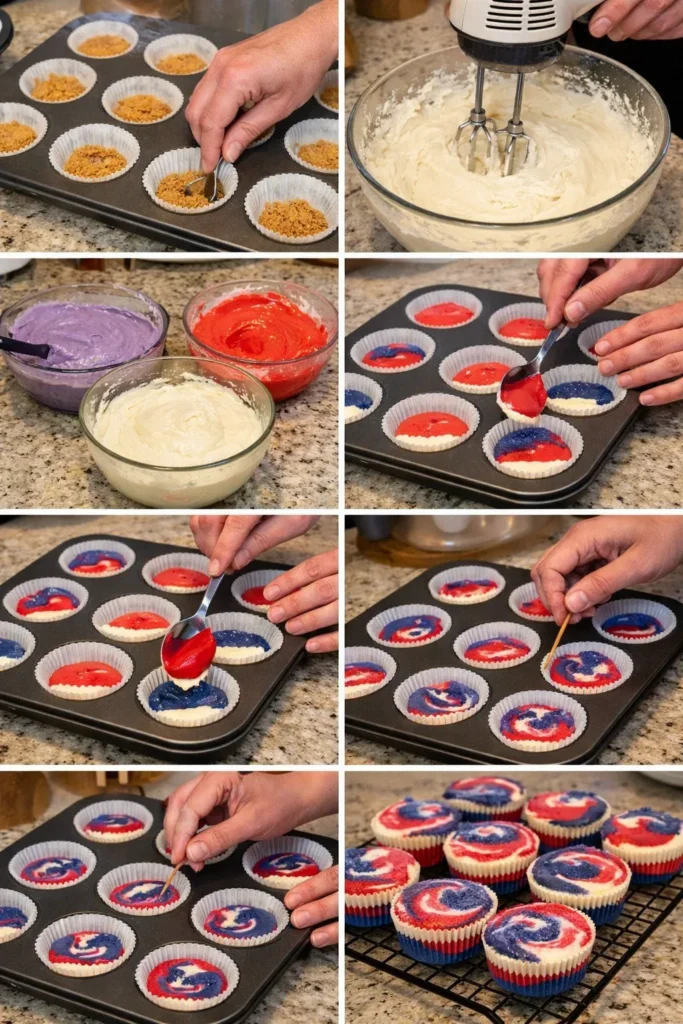
Step 3: Make the Cheesecake Filling
In a separate large bowl, beat the softened cream cheese with 1 cup sugar until the mixture is smooth and free of lumps. Add the vanilla extract and continue beating until fully incorporated. Then add the eggs one at a time, beating just until each egg is blended. Over‑mixing at this stage can incorporate too much air, which may cause the cheesecakes to rise and then sink.
Step 4: Divide and Flavor the Filling
Split the cheesecake batter evenly into three separate bowls. Gently fold the blueberry puree into the first bowl, the strawberry puree into the second bowl, and leave the third bowl plain for the classic white layer. Stir each bowl just enough to create a uniform color without turning the puree completely into the batter.
Step 5: Layer and Swirl
Begin by spooning a layer of the plain batter into each muffin cup, filling them about one‑third full. Follow with a layer of the strawberry‑infused batter, then finish with the blueberry‑infused batter. Use a toothpick or a thin skewer to create a gentle swirl pattern, moving it vertically through the layers to achieve a marbled flag effect.
Step 6: Bake the Cheesecakes
Place the muffin tin in the preheated oven and bake for 20‑25 minutes, or until the edges are set and the centers still have a slight wobble. This gentle jiggle is a sign that the interior will finish setting as the cheesecakes cool, resulting in a silky texture.
Step 7: Cool and Chill
Remove the tin from the oven and allow the mini cheesecakes to cool on a wire rack for about 30 minutes. Once they are at room temperature, transfer the tin to the refrigerator and chill for at least 2 hours, or overnight for best flavor development. Chilling firms up the filling and makes the desserts easier to remove from the liners.
Step 8: Add the Topping
Just before serving, pipe or dollop a generous swirl of whipped cream on top of each cheesecake. For an extra decorative touch, you can add a fresh berry or a tiny flag toothpick. The whipped cream adds a light, airy contrast to the dense cheesecake base.
Variations and Twists
The basic recipe is a canvas for creativity. For a chocolate lover, incorporate a tablespoon of melted dark chocolate into the plain batter before layering. If you prefer a tangier flavor, substitute a portion of the strawberry puree with raspberry puree. Seasonal fruit variations work well too; try mango puree for a summer twist or pomegranate seeds for a burst of color and texture. For a festive adult version, drizzle a touch of vanilla‑infused caramel sauce over the finished cheesecake just before serving.
What to Serve With Red, White & Blue Mini Cheesecakes
Pair these mini cheesecakes with light, refreshing beverages to balance their richness. A chilled glass of sparkling grape juice or a citrus‑infused water complements the berry flavors without overwhelming the palate. For savory sides, consider a simple mixed greens salad with a light vinaigrette, which provides a crisp contrast. If you’re hosting a full brunch, add scrambled eggs, fresh fruit salad, and toasted bagels to create a well‑rounded menu.
Pro Tips for Perfect Results
- Use room‑temperature cream cheese and eggs to ensure a smooth batter and prevent lumps.
- Do not over‑mix the batter after adding the eggs; gentle folding preserves the delicate texture.
- Line the muffin tin with quality paper liners to make removal easy and avoid sticking.
- Allow the cheesecakes to cool gradually; a sudden temperature change can cause cracks.
- For an extra decorative finish, lightly torch the tops of the cheesecakes before chilling.
Following these tips will help you achieve a flawless appearance and a creamy mouthfeel every time you bake.
Common Mistakes to Avoid
- Skipping the step of pressing the crust firmly can lead to a crumbly base that falls apart.
- Over‑baking creates a dry texture; the cheesecake should still have a slight jiggle when you remove it from the oven.
- Using cold cream cheese results in a lumpy filling; always soften it before mixing.
- Adding too much fruit puree can thin the batter, causing it to spread beyond the liner.
- Neglecting to chill the cheesecakes long enough makes them difficult to slice cleanly.
Storage, Reheating & Make‑Ahead Tips
Store the mini cheesecakes in an airtight container in the refrigerator for up to 4 days. For longer storage, wrap each cheesecake tightly in plastic wrap and freeze for up to 2 months. To serve from frozen, transfer them to the refrigerator the night before and let them thaw slowly; this preserves the texture. If you need to warm them slightly before serving, a quick 10‑second burst in the microwave will soften the whipped topping without melting the filling.
Frequently Asked Questions
Q: Can I use a different crust instead of graham cracker crumbs?
A: Yes, you can substitute with crushed vanilla wafers, digestive biscuits, or a gluten‑free cookie blend for a different flavor profile.
Q: How do I keep the swirls from mixing together?
A: Gently pour each colored batter and use a thin skewer to create a vertical swirl, avoiding horizontal mixing that would blend the colors.
Q: Is it possible to make these without an oven?
A: You can set the filled liners in a water bath on the stovetop using a large pot, but the texture may be slightly denser than baked versions.
Q: What is the best way to re‑heat a chilled cheesecake?
A: Briefly warm on a low‑heat setting in the microwave (about 5‑10 seconds) or let sit at room temperature for 10 minutes before serving.
Conclusion
These Red, White & Blue Mini Cheesecakes combine patriotic flair with effortless preparation, making them the ideal dessert for any 4th of July celebration. By following the detailed steps, using the right equipment, and applying a few pro tips, you’ll create a stunning, crowd‑pleasing treat that looks as good as it tastes. Enjoy the compliments and the festive spirit with every bite.
Print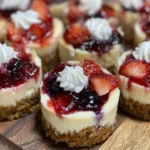
Easy Red, White & Blue Mini Cheesecakes for 4th of July
- Total Time: 55 minutes
- Yield: 12 mini cheesecakes 1x
- Diet: Vegetarian
Description
Red, White & Blue Mini Cheesecakes are a festive, easy-to-make dessert featuring a buttery graham crust, creamy vanilla cheesecake filling and vibrant strawberry and blueberry swirls, perfect for 4th of July parties and patriotic gatherings.
Ingredients
- 1 cup graham cracker crumbs
- 1/4 cup sugar
- 1/2 cup butter, melted
- 16 oz cream cheese, softened
- 1 cup sugar
- 1 tsp vanilla extract
- 3 large eggs
- 1 cup blueberry puree
- 1 cup strawberry puree
- Whipped cream for topping
Instructions
- Preheat oven to 325°F (160°C) and line a muffin tin with paper liners.
- Mix graham cracker crumbs, sugar, and melted butter; press into liners.
- Beat cream cheese and sugar until smooth, add vanilla, then eggs one at a time.
- Divide batter into three bowls; fold in blueberry puree, strawberry puree, leave one plain.
- Layer plain, strawberry, and blueberry batters in each cup; swirl gently.
- Bake 20-25 minutes until set; cool, then refrigerate 2 hours.
- Top with whipped cream before serving.
Notes
- For a gluten‑free version
- replace graham crumbs with gluten‑free cookie crumbs. Chill thoroughly for best texture. Swirl gently to maintain distinct red
- white
- and blue layers.
- Prep Time: 30 minutes
- Cook Time: 25 minutes
- Category: Dessert
- Method: Baked
- Cuisine: American
Nutrition
- Serving Size: 1 mini cheesecake
- Calories: 250
- Sugar: 20 g
- Sodium: 150 mg
- Fat: 15 g
- Saturated Fat: 9 g
- Unsaturated Fat: 4 g
- Trans Fat: 0 g
- Carbohydrates: 25 g
- Fiber: 0 g
- Protein: 4 g
- Cholesterol: 70 mg
Keywords: Red, White & Blue Mini Cheesecakes, easy patriotic dessert, 4th of july mini cheesecake recipe, quick berry cheesecake, festive dessert ideas, how to make mini cheesecakes, strawberry blueberry cheesecake, party dessert recipes, no bake cheesecake alternatives, summer celebration sweets