
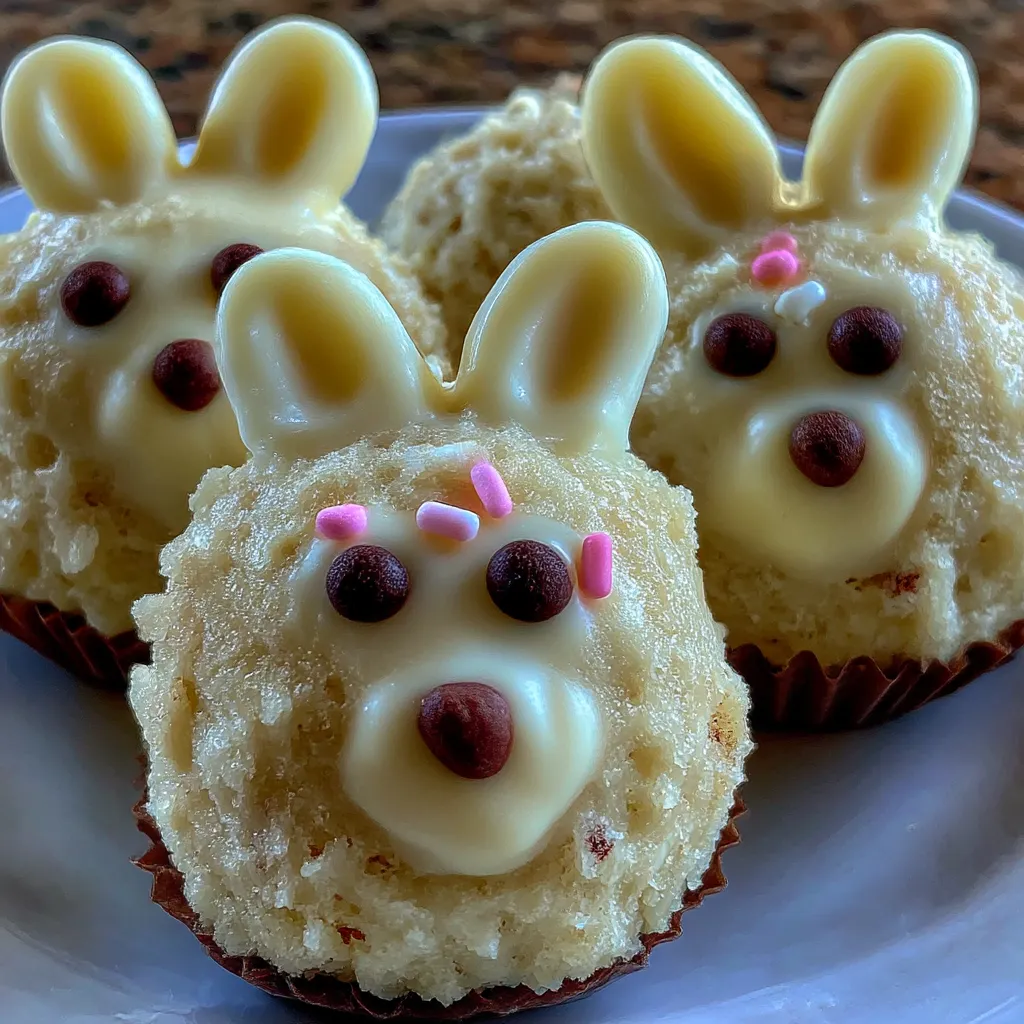
Bunny Oreo Balls are my go-to Easter treat for busy families. I’m a working chef who cherishes simple, warm desserts that feel special without bogging you down in the kitchen. These no-bake bites rely on just three core ingredients—Oreo cookies, cream cheese, and a glossy white chocolate coating—yet they look utterly festive with cute bunny faces. They’re kid-friendly, easy to customize for dairy needs, and make-ahead friendly, which is a lifesaver for moms juggling school runs, errands, and work calls. If you want a sweet showstopper that comes together quickly, this Bunny Oreo Balls recipe is your answer. Read on for practical tips, variations, and savvy shortcuts to keep dessert time stress-free and delicious for your whole family.
Table of Contents
Table of Contents
What makes Bunny Oreo Balls special
When I say Bunny Oreo Balls, I picture a dessert that fits my busy life. I juggle work, runs, and recipe testing, yet this treat shows up with a smile. Familiar flavors, cute bunny faces, and a no-fuss vibe—perfect for when time is tight. My family loves that it’s quick, kid-friendly, and comforting after busy days.
A warm connection to busy families
These bites feel like a hug after a long day. They’re three-ingredient magic, easy to whip up between calls.
The no-bake advantage for hectic days
No oven heat, no timer babysitting. I mix, chill, and decorate while chores fade away. For birthdays or quick after-school treats, these Bunny Oreo Balls save time and spread smiles.
Ingredients Bunny Oreo Balls
I keep the ingredient list tight for speed and flavor. Exact quantities appear at the bottom of the article and in the printable version.
Base ingredients for the bites
- Oreo cookies — 36 cookies (about 3 cups of crumbs) for a rich, chocolatey center.
- Cream cheese, softened — 225 g (8 oz) to bind the crumbs into smooth, rollable dough.
- White chocolate, melted — 300 g (about 10.5 oz) for a glossy, kid-friendly coating.
- Candy eyes — enough to give each bunny a cute, friendly face.
- Pink candy melts or sprinkles — for the noses and ears, adding festive flair.
Tip: If you need dairy-free or gluten-free options, swap in dairy-free cream cheese and gluten-free Oreos.
Optional additions and substitutions
- Vanilla extract — 1/2 teaspoon stirred into the cream cheese for extra depth.
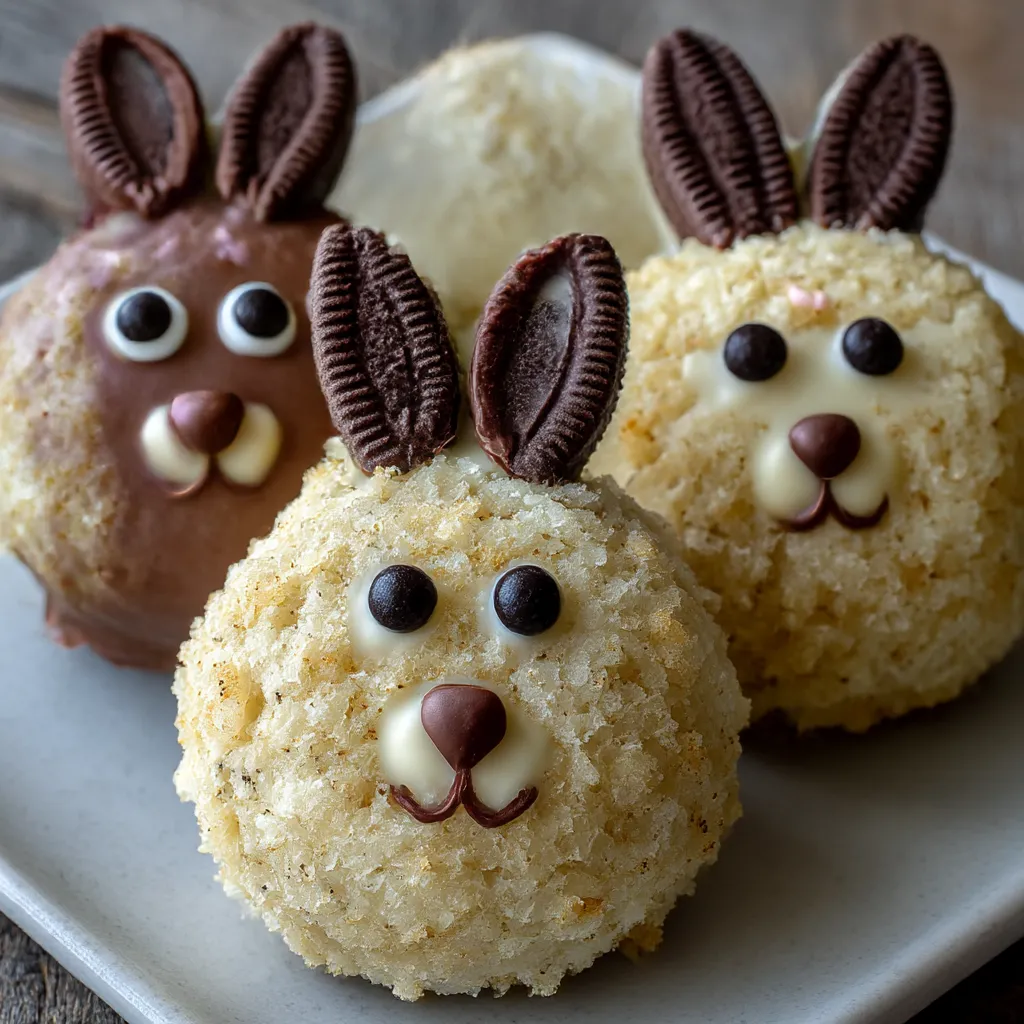
- Alternative coatings — dark or milk chocolate can replace white chocolate for a different look.
- Diet-friendly tweaks — use dairy-free white chocolate chips and dairy-free cream cheese as needed.
- Cookie variations — gluten-free Oreos or another sandwich cookie can work in a pinch.
- Decoration tweaks — edible glitter or tiny sugar pearls for extra sparkle.
How to Make Bunny Oreo Balls
Step 1: Crush Bunny Oreo Balls cookies into fine crumbs
I crush the Oreo cookies for Bunny Oreo Balls into fine crumbs with a processor or zip bag. This smooth, sandy base clings to the cream cheese. If chunks show up, pulse again.
Step 2: Mix crumbs with softened cream cheese until fully combined
Next I mix the Bunny Oreo Balls crumbs with softened cream cheese until the dough is smooth and holds its shape. If it’s too crumbly, add a teaspoon of cream cheese and stir.
Step 3: Roll mixture into oval shapes and place on a lined tray
I roll the Bunny Oreo Balls mixture into oval shapes and set them on a parchment-lined tray, keeping space between each. The goal is uniform size for even coating, so chill if the mix sticks.
Step 4: Chill until firm
Chill the formed Bunny Oreo Balls until they’re firm to the touch, about 20 minutes. These no-bake bites stay firm.
Step 5: Dip each chilled Oreo ball into melted white chocolate and place back on the tray
Dip each chilled Oreo ball into melted white chocolate, letting the excess drip off, then place it back on the tray. Work in small batches as the coating sets fast.
Step 6: Attach candy eyes and create bunny ears and noses with candy melts or sprinkles
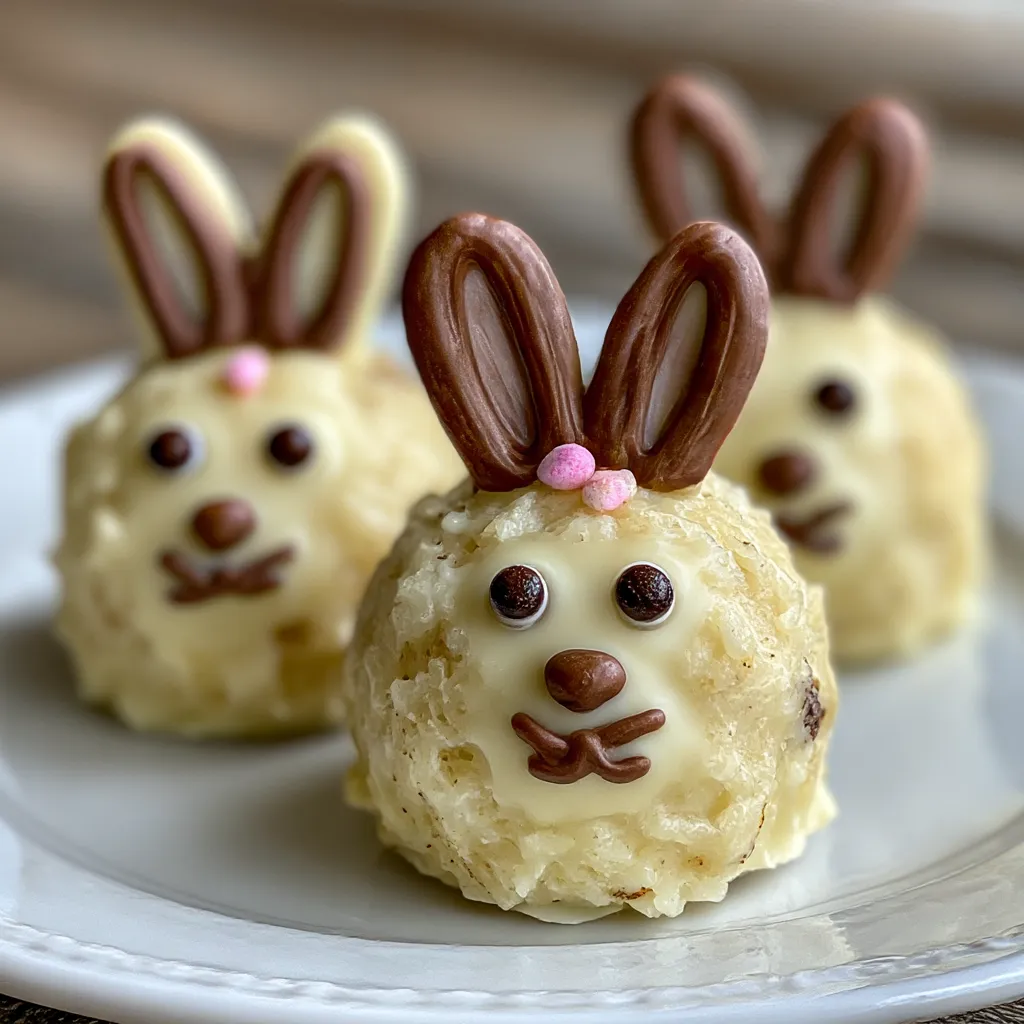
With the coating still tacky, press on candy eyes. I shape bunny ears with pink melts or sprinkles. And I add a tiny dab of melted candy for a cute pink nose.
Step 7: Chill again until fully set, then serve
Chill the decorated Bunny Oreo Balls again until fully set, about 15 minutes. These no-bake treats are ready to shine on a platter.
Tips for Success
Quick, no-fuss tips
- I keep the dough cold; cold dough holds its shape better for rolling.
- Chill the formed balls for about 20 minutes before dipping for a cleaner coat.
- Use a small scoop for uniform bunny sizes so coating looks even.
- Dip in small batches and let excess chocolate drip back into the bowl.
- If the chocolate thickens, I microwave in 5–10 second bursts and stir until smooth.
- Decorate eyes and ears while the coating is still tacky so everything sticks.
Make-ahead and storage notes
- I assemble up to a day ahead; store chilled in an airtight container.
- Decorated bites keep in the fridge for 3–4 days.
- For longer storage, freeze uncoated or coated balls up to 1 month; thaw in the fridge and re-dip if needed.
Equipment Needed
Essential tools
- My processor or bag and rolling pin to crush cookies.
- A mixing bowl and spoon for mixing dough.
- A parchment-lined tray for chilling and setting.
- A microwave-safe bowl for melting white chocolate.
Handy alternatives
- If you lack a processor, crush cookies in a sturdy bag with a rolling pin.
- If you don’t have a microwave, melt chocolate over a double boiler.
Variations
Want to switch up Bunny Oreo Balls? I love tweaks that keep them easy, festive, and perfect for busy days.
Flavor twists
- I use dark or milk chocolate for depth, with a quick white drizzle for contrast and extra shine.
- Sprinkle pretzels, chopped nuts, or crisped rice on the tacky coating for a playful crunch.
- Fold in vanilla or citrus zest into the cream cheese for brightness and a soft aroma.
- Dust with cocoa, cinnamon, or colored sugar to match holidays or your party color palette.
- Seasonal twist: roll in pastel sprinkles for Easter-ready bites and a kid-approved sparkle.
Dietary-friendly options
- I gluten-free option: use gluten-free Oreos and cookies, and dairy-free cream cheese if needed.
- I dairy-free version: swap in dairy-free cream cheese and dairy-free white chocolate for melting.
- I vegan tweak: choose vegan chocolate and vegan cream cheese; check decorations for non-dairy.
- I sugar-friendly twist: pick sugar-free cookies and sprinkles; texture may vary.
Why You’ll Love This Bunny Oreo Balls
Time-saving and crowd-pleasing
I adore how these Bunny Oreo Balls save time without losing wow factor. Three ingredients, no bake, a glossy coat. They chill while I juggle chores, then disappear at gatherings with minimal effort and big smiles.
Kid-friendly and customizable
My kids love decorating their bunny faces, turning a simple dessert into a memory. I customize with coatings, dyes, and toppings to fit holidays or picky eaters. It’s a flexible, playful project that keeps dessert time joyful.
Serving Suggestions
Plating ideas
- Display on a pastel platter for a festive Easter vibe.
- Create a bunny-shaped cluster for a cute centerpiece.
- Line the tray with parchment for easy serving.
Pairings and presentation tips
- Pair with vanilla punch or citrus sparkling water.
- Add fresh berries for color and balance.
- Use mini signs to label flavors.
A Kid-Friendly Easter Brunch with Bunny Oreo Balls
I love bringing Bunny Oreo Balls to a kid-friendly Easter brunch. They travel well, chill beautifully, and spark joy with their bunny faces. Plus, they help me balance busy schedules, letting me prep a dessert that feels festive without stealing the spotlight from savory dishes. When guests arrive, these bites disappear fast, especially with little hands passing them around.
Pair the platter with fresh fruit, mini quiches, and cups of milk or sparkling water. The colors of the Easter table pop against white chocolate and pale pink accents.
If you’re short on time, you can assemble centers a day ahead and decorate just before serving for the freshest look.
Make-ahead prep for gatherings
Make-ahead prep saves me from last-minute chaos on brunch day.
I assemble the centers up to a day ahead, then chill.
Keep the coated balls in an airtight container in the fridge.
Decorate or re-dip the eyes and ears just before serving for the freshest look.
Fun decorating ideas for kids
Children love personalizing their Bunny Oreo Balls.
Set up a decorating station with pastel sprinkles, edible eyes, and pink noses.
Let little hands press ears, add a dab of color, and snap photos.
Provide a few ready-to-use kits and supervise for safety.
FAQs
Can I use dark or milk chocolate instead of white?
Yes, you can swap in dark or milk chocolate for a different look and flavor. I love dark chocolate for a rich, striking contrast against the white bunny eyes. If you choose a darker coating, skip the extra white drizzle so the bunny faces pop.
How should I store Bunny Oreo Balls for freshness?
I store Bunny Oreo Balls in an airtight container in the fridge to keep the cream cheese firm. If you’re not serving them soon, keep decorations minimal until serving day. For longer storage, freeze uncoated or coated balls up to a month, then thaw in the fridge.
Can I freeze the uncoated mix or the finished balls?
Yes, you can freeze both the uncoated mixture and the finished Bunny Oreo Balls. Freeze in a single layer first, then transfer to an airtight container to prevent sticking. Thaw the uncoated mix in the fridge and re-roll, or thaw the finished balls and re-dip if needed.
Are these suitable for a classroom party or Easter basket?
They’re kid-friendly and easy to share, making them great for classroom parties or Easter baskets. Check with teachers or caregivers about dairy ingredients and allergies. You can customize colors and decorations to match the theme while keeping them fun and accessible.
Final Thoughts
The comfort of a simple, charming treat
I reach for Bunny Oreo Balls when time is tight. They feel like a warm hug in white chocolate. Three ingredients, a sprinkle of whimsy, and a crowd-pleasing finish. No drama, just delight. Each bite carries memories of kitchen experiments and family giggles. In a busy week, they prove sweetness can be fast, friendly, and comforting. The no-bake magic lets me multitask while dessert comes to life.
Encouragement to personalize and share
These Bunny Oreo Balls invite your stamp of personality. Change the coating, decorations, or size to fit your crowd. I love hearing how families improvise textures and colors. Make a dairy-free or gluten-free version for relatives with allergies. Pass the platter, snap photos, and savor the shared smiles.
Print
Bunny Oreo Balls: 3-Ingredient Easy No-Bake Treat
- Total Time: 1 hour
- Yield: 20–24 bunny balls 1x
- Diet: Vegetarian
Description
Bunny Oreo Balls: a cute, no-bake Easter dessert made with crushed Oreo cookies and cream cheese, dipped in white chocolate and decorated with bunny faces for a fun, kid-friendly treat.
Ingredients
- 36 Oreo cookies
- 225 g cream cheese, softened
- 300 g white chocolate, melted
- Candy eyes, for decorating
- Pink candy melts or sprinkles, for decoration
Instructions
- Crush Oreo cookies into fine crumbs using a food processor.
- Mix crumbs with softened cream cheese until fully combined.
- Roll mixture into oval shapes and place on a lined tray.
- Chill until firm.
- Dip each chilled Oreo ball into melted white chocolate and place back on the tray.
- Attach candy eyes and create bunny ears and noses using candy melts or sprinkles before the coating sets.
- Chill again until fully set, then serve.
Notes
- Chill the mixture well before shaping for best results.
- Keep the balls refrigerated until ready to serve.
- If the mixture is too soft, refrigerate for 15–20 minutes and re-roll.
- Use parchment paper to prevent sticking.
- Variations: use dark or milk chocolate coating instead of white chocolate.
- Prep Time: 20 minutes
- Cook Time: 0 minutes
- Category: Dessert
- Method: No-Bake
- Cuisine: American
Nutrition
- Serving Size: 1 bunny ball
- Calories: 190–210 kcal
- Sugar: 12–15 g
- Sodium: 40–60 mg
- Fat: 12–14 g
- Saturated Fat: 7–8 g
- Unsaturated Fat: 4–5 g
- Trans Fat: 0 g
- Carbohydrates: 22–25 g
- Fiber: 0–1 g
- Protein: 2–3 g
- Cholesterol: 10–20 mg
Keywords: Bunny Oreo Balls, Easter dessert, no-bake treats, Oreo balls, bunny treats, kid-friendly dessert