Flavored Rice Krispie Treats: Banana Pudding Rice Krispies are my go-to dessert when deadlines loom and the kitchen feels busy. I’m a chef who loves turning simple pantry staples into comforting, crowd-pleasing sweets, and I’ve learned that a treat can taste indulgent without stealing your precious time. Bananas, vanilla pudding, and crisp cereal come together to create a treat that feels special yet doable, even on hectic weeknights. This guide shares how to maximize banana flavor, kid-friendly toppings, make-ahead steps, and practical substitutions. Get ready to bake with your hands full and your mouth watering.
Table of Contents
Table of Contents
what make this Flavored Rice Krispie Treats: Banana Pudding Rice Krispies special
Flavored Rice Krispie Treats: Banana Pudding Rice Krispies are exactly what I reach for when deadlines loom. I’m a home cook who loves turning pantry staples into comforting, crowd-pleasing bites. They’re perfect for busy moms and professionals who crave a sweet finish without long prep. I whisk in ripe bananas, vanilla pudding, and a touch of creaminess to keep things simple yet special. The result is a treat that travels well and stays soft, adaptable to toppings you already have on hand. From pantry to plate in under an hour, you’ll reach for it again.
Flavor profile of Flavored Rice Krispie Treats: Banana Pudding Rice Krispies
Flavor profile: Banana Pudding Rice Krispies deliver a sunny banana aroma with vanilla pudding’s creamy kiss. The cereal stays crisp at first bite, then softly yields to a chewy undercurrent. Butter adds depth, and a pinch of salt keeps the sweetness honest. The result tastes like a mini banana pudding, but in bar form—sweet, bright, and comforting—perfect for kids who want taste and adults who want retro nostalgia without fuss.
Why this recipe resonates with busy moms and professionals
As a busy mom or a professional, you need treats that deliver joy without derailing your day. I love that these bars come together fast, use pantry staples, and travel well for potlucks or after-school snacks. They’re forgiving if you miss a splash of vanilla or skip a sprinkle of toppings. And because they’re portion-controlled, you can satisfy a craving without going overboard.
Ingredients Flavored Rice Krispie Treats: Banana Pudding Rice Krispies
I gather the core ingredients for Flavored Rice Krispie Treats: Banana Pudding Rice Krispies with a mindful eye. I keep it simple, bright, and doable, so you can mix, press, and slice between meetings or after soccer practice. It’s comfort in a pan with minimal fuss.
- 6 cups Rice Krispies cereal (gluten-free option available) — crunchy base that soaks up banana flavor.
- 3 tablespoons unsalted butter — melts with marshmallows to bound the bars.
- 10 ounces mini marshmallows — binds and creates that chewy, nostalgic bite.
- 1 ripe banana, mashed — adds natural sweetness and banana aroma.
- 1/2 cup instant vanilla pudding mix (dry) — boosts banana pudding flavor without extra moisture.
- 1 teaspoon pure vanilla extract (optional) — deepens the pudding note.
- Pinch of salt — balances sweetness and lifts flavors.
Exact quantities are listed below for easy printing.
Core ingredients for Flavored Rice Krispie Treats: Banana Pudding Rice Krispies
I keep the core lineup tight: the cereal, butter, marshmallows, mashed banana, pudding mix, a splash of vanilla, and a touch of salt. These essentials deliver the bright banana pudding vibe without turning dessert into a pro set.
Optional add-ins and substitutions for Flavored Rice Krispie Treats: Banana Pudding Rice Krispies
Want more texture or dairy-free options? Try white chocolate chips, crushed graham crackers, toasted coconut, or chopped nuts. For dairy-free, swap margarine or coconut oil and use dairy-free marshmallows. You can also switch to gluten-free cereal to keep it fully gluten-free.
How to Make Flavored Rice Krispie Treats: Banana Pudding Rice Krispies
Step-by-step instructions for Flavored Rice Krispie Treats: Banana Pudding Rice Krispies
Step 1 — Prep and melt
Line your pan with parchment and keep it handy. In a large pot, melt the butter over low heat, then stir in marshmallows until smooth. This is how Flavored Rice Krispie Treats: Banana Pudding Rice Krispies begin.
Step 2 — Fold in banana and pudding for flavor
Stir in mashed banana and the dry vanilla pudding mix to the melted marshmallows. Mix until the banana is evenly distributed and the mixture smells like creamy banana pudding.
Step 3 — Add cereal and form the bars
Pour in Rice Krispies and toss gently until coated. Scoop into the prepared pan, press firmly with a spatula, and smooth the top. The cereal should stay crisp at first bite.
Step 4 — Set, slice, and serve
Let cool completely, then lift from the pan and cut into bars. Serve immediately or store in an airtight container for up to 3 days at room temperature.
Tips for Success
- Read all ingredients first to plan your quick assembly.
- Line the pan with parchment for easy lift and clean cuts.
- Melt marshmallows gently on low heat to avoid scorching.
- Fold in mashed banana and pudding off the heat for smooth flavor.
- Stir in the Rice Krispies gently to keep crunch.
- Press firmly with a spatula for neat bars every time.
- Let the bars cool completely before slicing for tidy edges.
Equipment Needed
- 9×13 inch baking pan lined with parchment or foil for lift.
- Large pot or saucepan to melt butter and marshmallows.
- Spatula or wooden spoon for folding.
- Measuring cups and spoons for precise ingredients.
- Knife or bench scraper to cut clean bars.
- Optional: parchment scraps, nonstick spray, and a cutting board.
Variations
- Dairy-free and vegan option: use dairy-free butter or coconut oil and dairy-free marshmallows. Use plant-based pudding to keep the banana flavor.
- Gluten-free and nut-free upgrade: use gluten-free Rice Krispies and skip nuts. Add dairy-free chocolate chips if you like.
- Chocolate drizzle or chips: chocolate drizzle over cooled bars. Or fold in mini chips for a glossy finish.
- Cinnamon-vanilla twist: add 1/4 teaspoon cinnamon and an extra 1/2 teaspoon vanilla for warmer notes.
- Tropical banana-pudding twist: fold in 2 tablespoons crushed pineapple and 1 tablespoon shredded coconut.
- Mini bars for lunchboxes: press into a lined muffin tin for 12 bite-sized servings.
- Make-ahead and freezer-friendly: wrap individually and freeze up to 2 months; thaw at room temp.
Why You’ll Love This Flavored Rice Krispie Treats: Banana Pudding Rice Krispies
I reach for Flavored Rice Krispie Treats: Banana Pudding Rice Krispies when deadlines loom. They come together fast, with pantry staples and a crowd-pleasing banana pudding flavor. The bars stay soft but hold their shape, making them perfect for lunchboxes or potlucks. Cleanup is a breeze, and the kids love the gentle sweetness. It’s dessert that respects a busy schedule—and a busy heart. It proves simple can be irresistible.
Serving Suggestions
- I pair a chilled glass of vanilla oat milk with these bars for a creamy contrast.
- Slice into neat squares and arrange on a pretty platter.
- Drizzle a hint of chocolate or caramel for a festive touch.
- Add banana slices or berries for color, balance, brightness, and to wow guests.
Bonus Tips to Elevate Flavored Rice Krispie Treats: Banana Pudding Rice Krispies
- I like to use brown butter for a nutty depth that boosts banana flavor.
- I chill the marshmallow mixture slightly before adding cereal to keep bars neat.
- I mash banana with a fork to avoid lumps for smoother bites.
- I add a pinch of salt to brighten flavor and balance sweetness.
- I sprinkle mini chocolate chips or rainbow sprinkles for a festive look.
- I chill the set slab 20 minutes, then wipe the knife between cuts.
- I freeze leftovers for longer storage, making them travel-ready for potlucks.
- I swap in dairy-free pudding for a dairy-free banana punch.
- I fold in whipped cream at the end for extra creaminess.
FAQs
Can I make these ahead and store them?
Yes. These Flavored Rice Krispie Treats: Banana Pudding Rice Krispies travel well and can be made a day ahead. Store tightly wrapped at room temperature for up to 2 days, or refrigerate for up to a week. If chilling, let them come to room temp before slicing to keep edges neat.
Can I use dairy-free pudding or non-dairy milk?
Absolutely. Use dairy-free vanilla pudding mix or dairy-free pudding powder for the banana pudding vibe. Replace cow’s milk with almond, oat, or coconut milk when needed. The texture stays chewy as long as you keep the marshmallows and cereal balanced. Just check ingredient labels for gluten and dairy.
How long do they keep at room temperature?
At room temperature, these bars stay fresh for about 2 to 3 days if kept in an airtight container. For longer shelf life, refrigerate up to a week. If you’re taking them on the go, wrap individually to protect them from humidity and keep their shape.
Can I use gluten-free cereal?
Yes. You can swap in gluten-free Rice Krispies or another gluten-free puffed cereal. Look for certified gluten-free labels to avoid cross-contamination. The rest of the recipe remains the same, giving you a dessert that’s friendly to gluten-free diets without sacrificing flavor.
Final Thoughts
These Flavored Rice Krispie Treats: Banana Pudding Rice Krispies arrived as a bright rescue on a Monday when the pace was wild. I love how a simple pan, a few pantry staples, and a scoop of banana sunshine can lift a weary afternoon. The bars travel well, cut cleanly, and disappear fast, which makes them a trusted ally for busy families and late-night writers alike. If you crave comfort with less fuss, this recipe proves that joy can be quick, approachable, and memorable. Its banana-pudding aroma lingers pleasantly, long after the last bite. They make busy days feel sweeter inside.
Print
Flavored Rice Krispie Treats: Banana Pudding Rice Krispies3
- Total Time: 6 hours 45 minutes
- Yield: 8 servings 1x
- Diet: Halal
Description
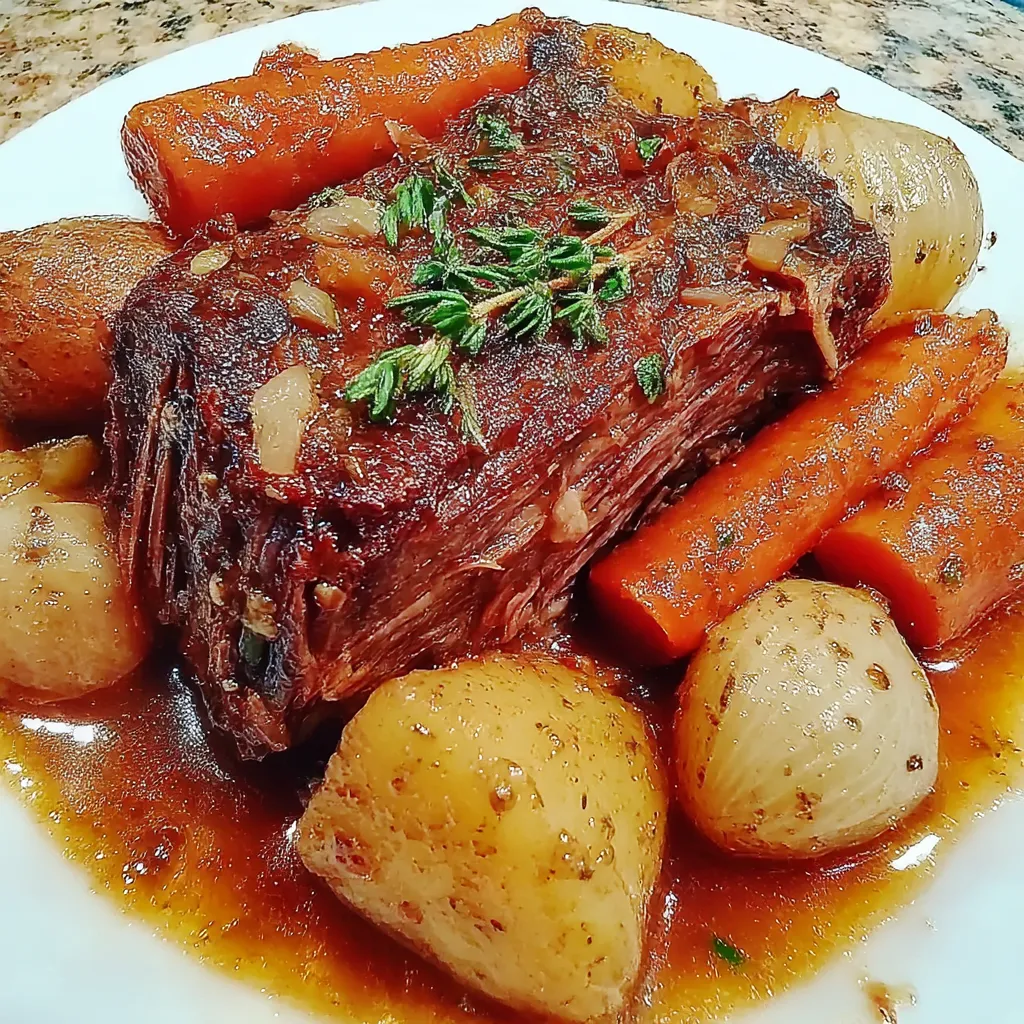
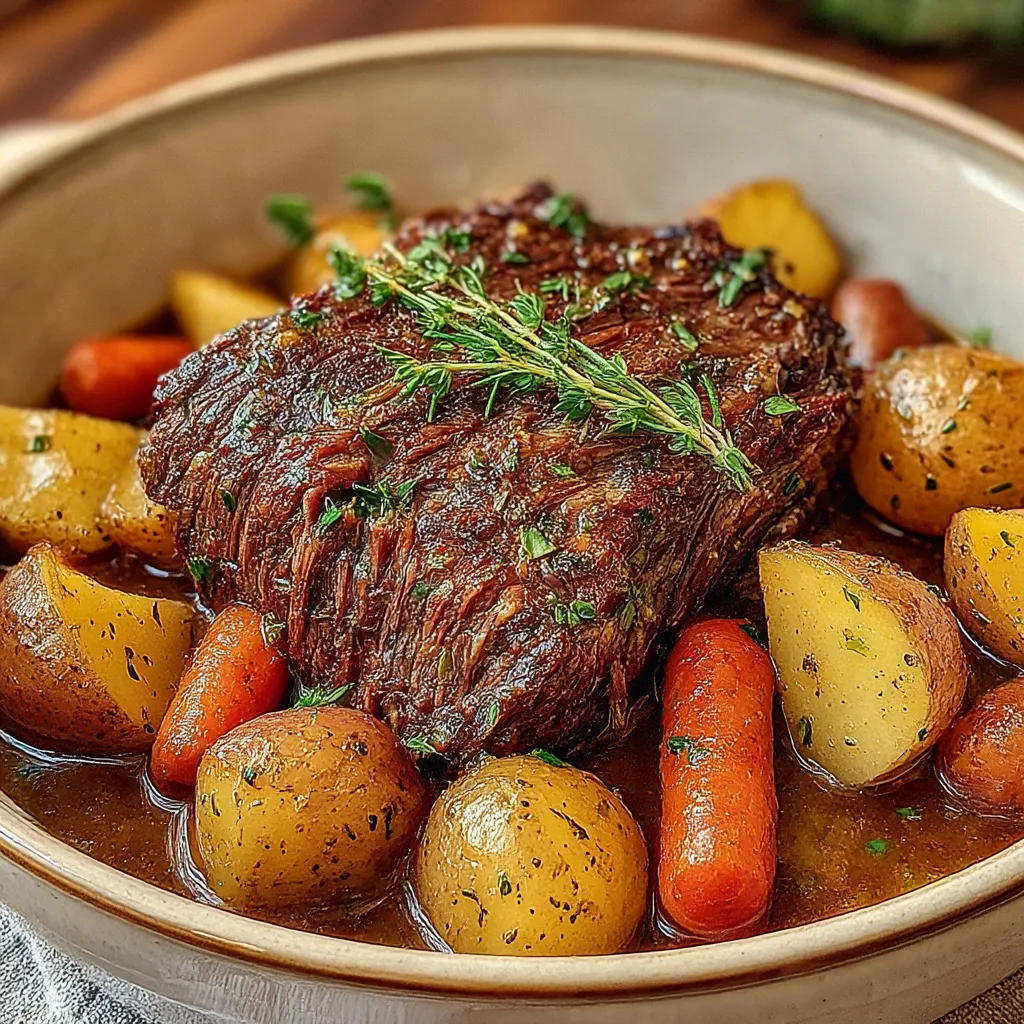
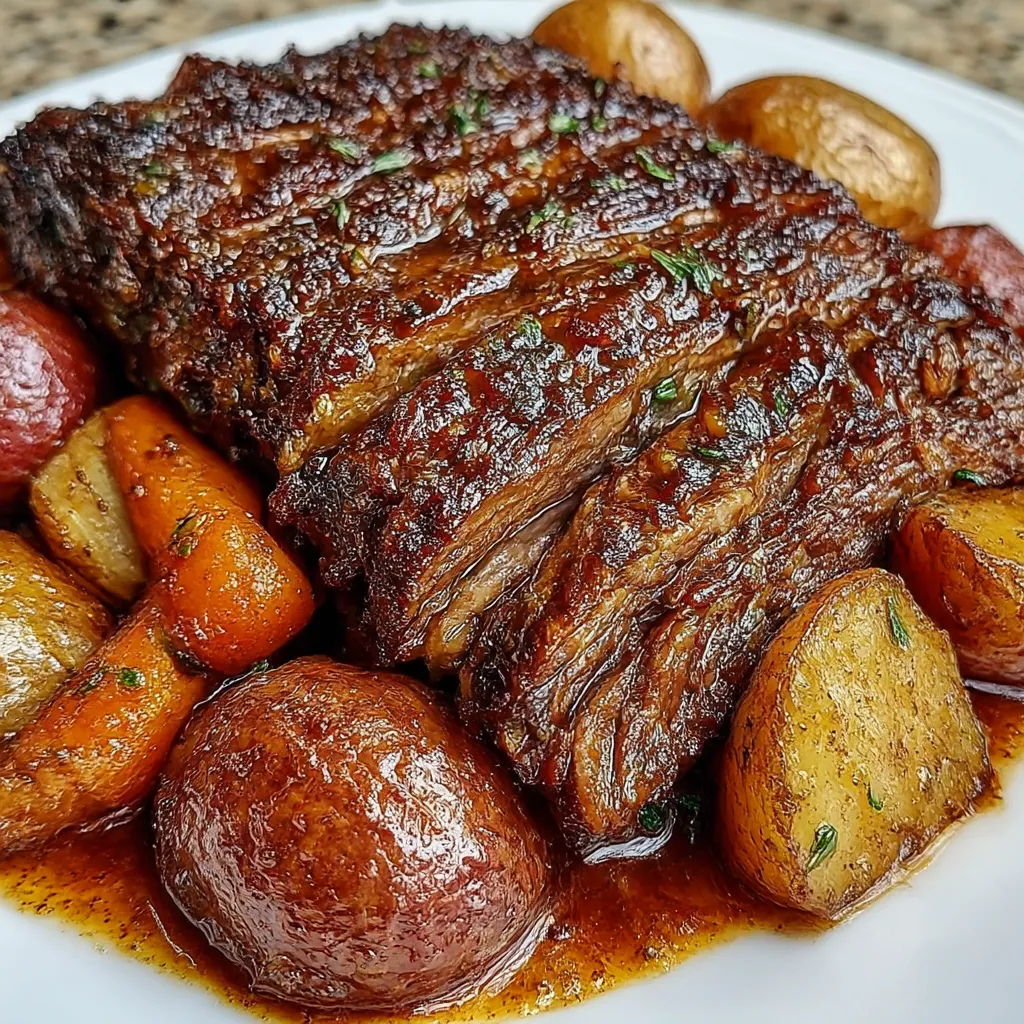
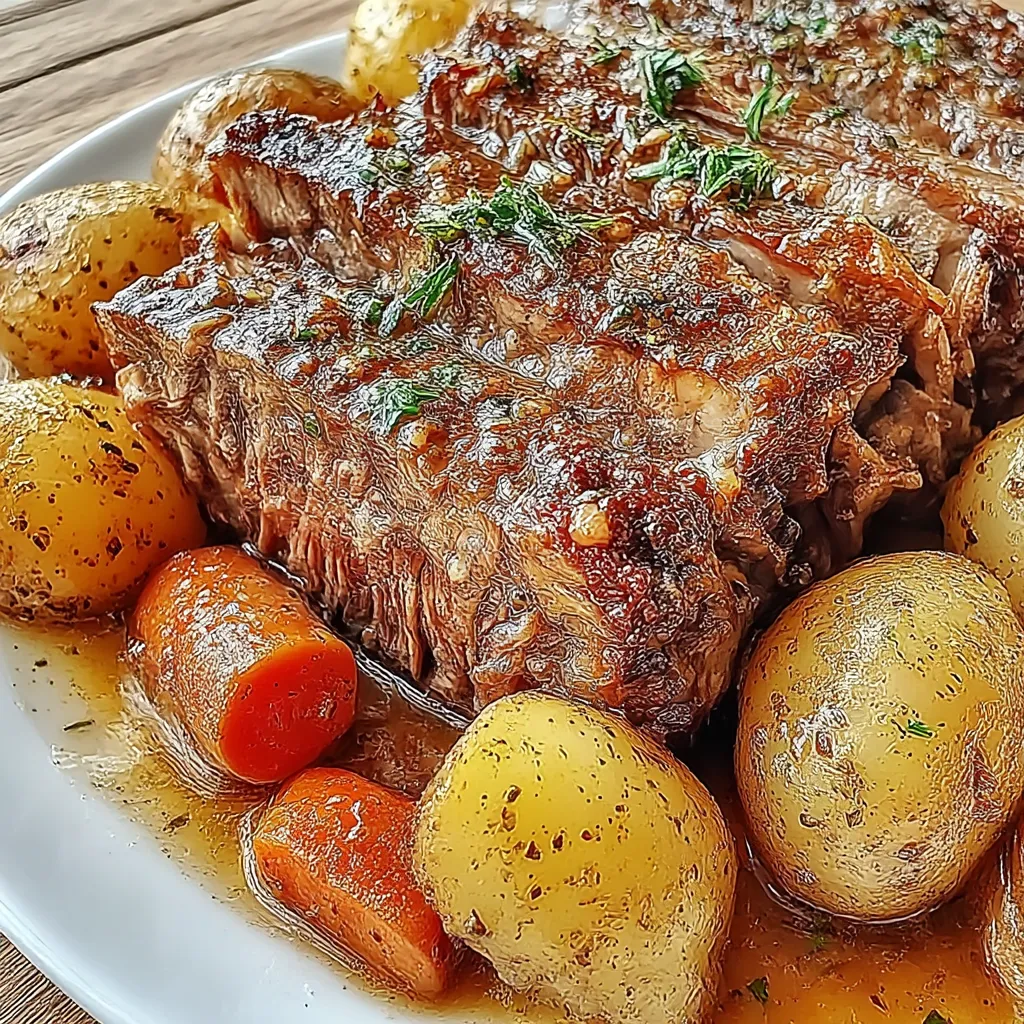
Flavored Rice Krispie Treats: Banana Pudding Rice Krispies – Crock Pot Pot Roast recipe: This Midwest-style comfort dish features tender beef chuck roast, hearty vegetables, and a savory gravy, all slow-cooked in the crock pot for an easy, cozy dinner.
Ingredients
- 3–4 lb beef chuck roast (halal)
- 1 tsp salt
- 1 tsp black pepper
- 1 tsp garlic powder
- 1 tsp onion powder
- 1 tsp dried thyme or rosemary
- 2 tbsp olive oil
- 1 onion, chopped
- 4 carrots, cut into chunks
- 4–5 potatoes, quartered
- 3 cups beef broth (halal, gluten free)
- 2 tbsp cornstarch + 2 tbsp water (optional, for gravy)
Instructions
- Heat olive oil in a skillet over medium-high heat. Season the chuck roast with salt, pepper, garlic powder, onion powder, and herbs.
- Sear the roast on all sides until well browned, about 2–3 minutes per side.
- Place the onion, carrots, and potatoes in the bottom of the crock pot. Place the seared roast on top of the vegetables.
- Pour beef broth over everything.
- Cover and cook on LOW for 6–7 hours until the beef is tender and vegetables are cooked through.
- Optional gravy: Transfer cooking liquid to a saucepan, whisk in cornstarch slurry, and simmer for 5 minutes until thickened.
- Slice or shred the roast and serve with vegetables and gravy.
Notes
- Halal-certified beef and halal beef broth are used in this recipe.
- Gluten-free when using halal gluten-free beef broth; the optional gravy can be kept gluten-free by using gluten-free cornstarch.
- Let the roast rest for 10 minutes after cooking before slicing for juicier results.
- Leftovers refrigerate well for 3–4 days or can be frozen for longer storage.
- Prep Time: 15 minutes
- Cook Time: 6 hours 30 minutes
- Category: Main Course
- Method: Slow Cooker
- Cuisine: American
Nutrition
- Serving Size: 1 serving (about 8 oz roast with vegetables)
- Calories: Approximately 520
- Sugar: 6 g
- Sodium: 850 mg
- Fat: 28 g
- Saturated Fat: 10 g
- Unsaturated Fat: 18 g
- Trans Fat: 0 g
- Carbohydrates: 28 g
- Fiber: 5 g
- Protein: 40 g
- Cholesterol: 120 mg
Keywords: Crock Pot Pot Roast, Slow Cooker Pot Roast, Halal beef roast, Beef and vegetables, Easy dinner, Midwest comfort food, Family dinner, Gluten free, Slow cooker beef